Fonts View
The Fonts view allows you to organize fonts into groups, to preview and manage fonts in Library. Fonts view includes My Collections, Groups, and Library.
My Collections
My Collections is usually a set of your favorite folders with fonts, or in other words, your personal font collections, located in folders on a hard disk or on a network drive. Personal collection can be a folder which you have on some cloud service and which is synchronized with a folder on hard disk of your computer. When you add this folder to My Collections node of the Fonts view, FontExpert searches all subfolders and fonts in the collection folder and adds information about fonts to FontExpert database.
My Collections folders can be activated or installed.

 |
Attach a folder to My Collections |
|
 |
Detach a folder from My Collections |
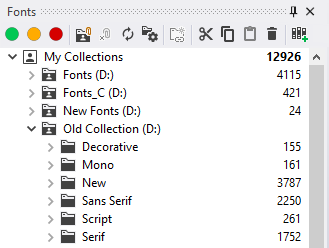
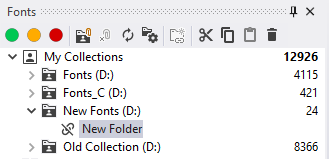
For example, if you have a folder "C:\MyFonts" and you have added this folder to My Collections, it appears on the top level as "My Fonts (C:)". FontExpert provides you a set of standard edit commands to allow you to manage folders in your collections: Cut, Copy, Paste, Delete, Create Folder, Rename. You can also drag and drop folders within My Collections and between My Collections and Groups.
Be careful when you Delete folders within My Collections. Delete here means that you really delete selected folder and place it to Recycle Bin.
Synchronization
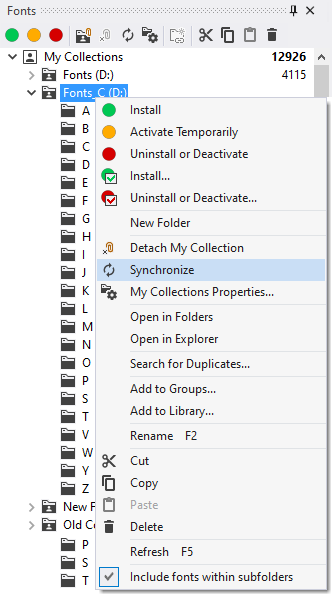
FontExpert "thinks" that My Collections is a set of folders whose contents can be changed by third party application. For example, it is possible that you open Windows Explorer and delete or rename folders within your "C:\MyFonts" collection or delete or add fonts. To let FontExpert know about changes in your collection you must use Synchronize command. FontExpert will synchronize the contents of your collection in My Collections node with actual contents. If you work with your collection using FontExpert edit features (Copy, Delete, etc.) no synchronization is needed as FontExpert automatically keeps database synchronized with actual folders in your collection. Synchronization is needed if you know that you changed anything in your collection using third party applications, such as third party file manager.
Imagine that your collection is a shared folder on a network drive (or a folder linked to remote "cloud" folder) and its contents are managed by your font administrator. When you run FontExpert and you know that the contents of your collection may be changed, than do Synchronization. Select the collection folder and choose Synchronize menu command from right-click menu.
If the collection folder becomes unavailable (for example, shared network drive was temporarily disconnected, or if you deleted collection using third party file manager), then the collection is displayed with a special icon that shows that the folder is not connected to actual physical folder (it is "unlinked").
If shared network drive with your collection becomes connected again, then the collection will be displayed again with normal icon and you will be able to preview fonts in it.
TIPS
While dragging files, hold the Ctrl key to copy source folder or source files to the selected folder in My Collections. Hold the Shift key to move source folders or files.
Synchronization on Application Launch and Autoactivation
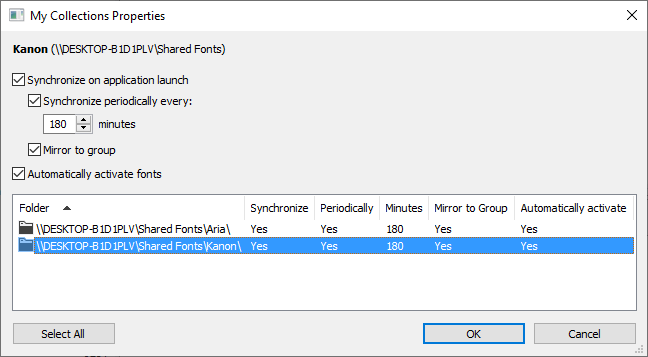
You can configure each folder in My Collection to be synchronized and activated when FontExpert is launched.
Select a folder in My Collection and choose My Collection Properties menu command or press this button on the toolbar:

My Collections Properties window appears.
In this window you can set the synchronization and activation options for selected folder, or modify options for other folders in My Collections.
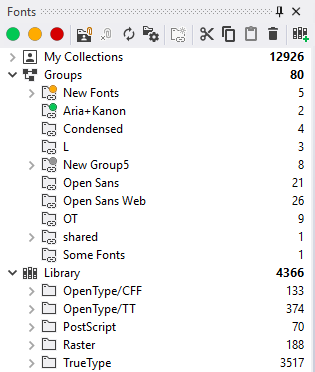
Groups
Each group is a logical folder with fonts that link to fonts in Library. Groups allow you to activate and deactivate fonts as font sets and to see the state of your fonts. If all fonts in a group are permanently installed, this group is shown with green circle. If all fonts in a group are temporarily activated, then the group is shown with yellow circle. If some fonts in a group are permanently installed, some are temporarily activated, and/or some fonts remain uninstalled, then this group is shown with gray circle.
To create a new font group, choose Group/New Group from the main menu, or right click Groups node or a group in the Fonts view and choose New Group from the popup menu.
 |
Create New Group |
You can copy folders in My Collections (or in Windows Explorer) and paste them into a group within the Fonts view. You can also copy a group folder and paste it to a selected My Collection folder.
You can drag files from Windows Explorer and drop them into a selected group folder in the Fonts view.
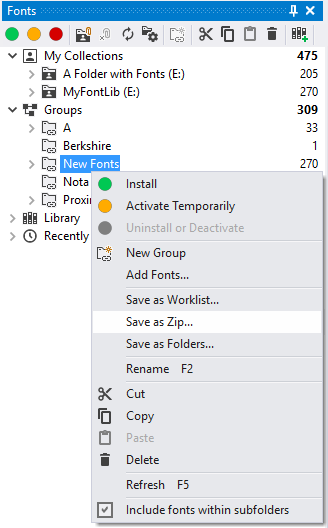
Saving a group as a worklist, as a ZIP file, or as a folder
While a group is a virtual folder containing references to library fonts, you can save any group as a regular folder, as well as a worklist file, or as a ZIP archive. The ZIP archive file will contain all fonts of the selected group.
More than one group can be selected for saving.
TIPS
While dragging folders or files, hold the Ctrl key to copy folders or fonts to the selected group. Hold the Shift key to move.
You can create groups using Group/Create Groups from Folder Structure... menu command.
To export all groups as a hierarchy of physical folders, use Group/Create Folder Structure from Groups... menu command.
Toolbar Button |
Description |
|
|
Install permanently. |
|
|
Activate Temporarily. |
|
|
Uninstall or Deactivate. |


Colored Item in the main view |
Description |
|
|
The font is installed permanently (font is active). |
|
|
The font is activated temporarily (font is active). |


To install a group of fonts, select the group folder in the Fonts view and choose Install or Install... command.
To uninstall a group of fonts, select the group folder in the Fonts view and choose Uninstall or Uninstall... command.
To print selected fonts, choose File/Print Fonts... or File/Print Preview... from the main menu. See Printing for more details.
Library
Library is a powerful feature that allows you to preview your font library as a hierarchy of folders without actual rearranging files in the font storage.
FontExpert keeps fonts as a storage of font files and the database. When you add fonts to Library, only unique font files are added to font storage. For example, if you have two identical font files and try to add both to Library, only one font will be added, and another file will be ignored. Thus, font library does not contain font duplicates. It is safe to try to add fonts to Library many times - if fonts are already in Library, then no fonts will actually be added to Library on the second attempt.
NOTE: If you have two versions of the same font and the files are different (for example, they are having different file size of having different font properties, for example, at least one symbol in copyright string), then both files will be included to Library. These files are not considered as full duplicates.
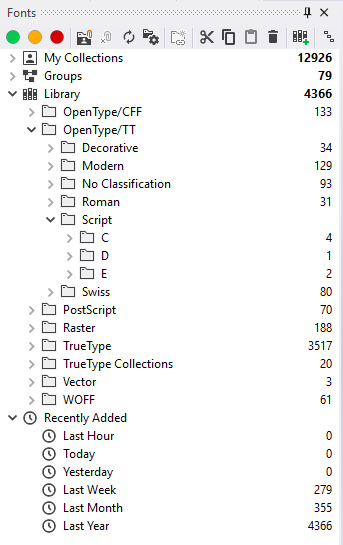
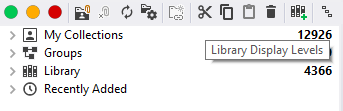
The Fonts view allows you to preview font library by many different ways - to choose Library Display Levels. The Library font storage remains unchanged while the Library node in the Fonts view shows different representations of the font Library.
Each folder in the Groups and Library nodes of Fonts view is not a regular folder, but just a virtual folder. Click to a folder to search for fonts in your library. For example if you click to "A" folder in the "TrueType/Swiss/A" node, then the Fonts View will display all TrueType fonts with Swiss style and with family names beginning on A.
To customize Library tree node, select Library item in the tree and click to Library Display Levels button on the Fonts view toolbar. (Or open context menu and choose "Library Display Levels..." menu command.)
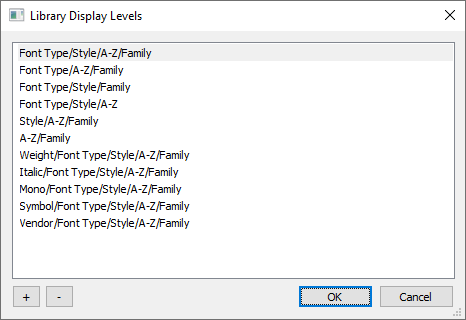
Library Display Levels window appears.
There are almost 1 million combinations of Library Display Levels, thus you can preview your font library storage by a 1 million different ways. By default, FontExpert includes in list no more than 10-20 combinations of levels and you can add your own custom levels.
The default view is Font Type/Style/A-Z/Family. It means that the fonts are displayed in Library node at first grouped by Font Type (on the first level) in the tree, then on the second level the fonts are grouped by Font Style (Roman, Swiss, etc.), then on the next level fonts are grouped by alphabet (A-Z), and at last fonts are grouped by Family.
Press "+" button to customize Library node by adding your own combination of levels in the folders tree.
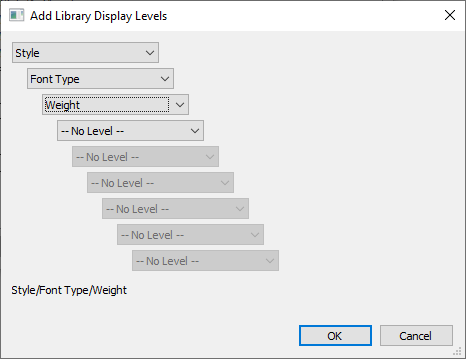
TIP: You can use some combinations to preview fonts in your library according to a given criteria. For example, Weight/Font Type/Style/A-Z/Family is a combination useful for previewing all fonts in your library having given font weight.
To assign keywords, ratings, and categories to Library fonts use the Tags view.